Written by Ari Mayzick · Go Travel Box
Published November 16, 2026 · Official practical information reviewed November 15, 2026
A successful first visit to the United States begins before the suitcase is packed. Entry documents, a manageable route, payment arrangements, suitable insurance, and a clear arrival plan can make the difference between a confident holiday and a series of expensive surprises.
This checklist is designed for international visitors planning an ordinary vacation. It helps organize the questions to resolve, but it does not determine an individual’s eligibility for entry. Requirements depend on nationality, passport, residence, travel history, purpose, route, and current rules. Check the relevant U.S. government guidance and your airline before committing to travel.
Use the sections in order. Resolve permission to travel and essential documents first, then build the itinerary, budget, and daily arrangements. A good fare or hotel offer is useful only after the trip is practical for the actual travelers.
First Visit to the USA? Start Here
- Check the passport and entry requirements for every traveler, including children.
- Establish whether a visa, ESTA under the Visa Waiver Program, or another applicable arrangement is required.
- Review current country-specific restrictions and any conditions connected with your travel history or documents.
- Choose a realistic region and count the full days available after arrival, departure, and transfers.
- Confirm how medical care, cancellation, and other relevant risks are covered by your insurance arrangements.
- Prepare the first accommodation address, onward or return travel information, and a clear airport transfer.
- Understand customs declarations and check the permitted status of any medicines, food, or restricted items.
- After admission, check the I-94 record if one applies to you and note the authorized stay date.
USA Travel Checklist at a Glance
| Area | What to have ready |
|---|---|
| Identity | The required valid passport and any additional documents |
| Permission | The visa or travel authorization applicable to the traveler |
| Children | Separate document checks and relevant consent or custody papers |
| Itinerary | First address, main route, and onward or return arrangements |
| Insurance | Coverage details and an assistance contact |
| Money | Suitable cards, a backup, and a realistic budget |
| Phone | A workable data or roaming plan and offline information |
| Luggage | Airline-compliant bags, essential medicines, and useful clothing |
| Arrival | A practical transfer and a modest first-day plan |
| During the trip | Admission record, current conditions, and secure documents |
| Departure | A timely exit and any required evidence for the route used |
Table of Contents
- First Visit to the USA? Start Here
- USA Travel Checklist at a Glance
- 1. Check Passport Validity and Each Traveler’s Documents
- 2. Establish the Correct Visa or ESTA Arrangement
- 3. Review Current Entry Restrictions and Understand Admission
- 4. Build a Route That Fits the Time Available
- 5. Arrange Insurance and a Plan for Medical Needs
- 6. Prepare Cards, Cash, and a Complete Budget
- 7. Set Up Phone Access and Offline Information
- 8. Pack for Airline Rules and the Actual Activities
- 9. Check Medicines, Food, and Restricted Items Before Departure
- 10. Make the First Airport Transfer Simple
- 11. Check the I-94 Record After Admission
- 12. Prepare for Domestic Flights and Local Transport
- 13. Check Driving and Rental-Car Requirements
- 14. Budget for Current National Park Fees and Reservations
- 15. Understand Food, Taxes, and Everyday Payments
- 16. Check Electricity, Measurements, and Time Zones
- 17. Plan for Accessibility, Children, and Different Needs
- 18. Keep Documents and Personal Information Secure
- Three Manageable First-Visit Itineraries
- An Illustrative Ten-Night U.S. Budget for Two Visitors
- A Preparation Timeline You Can Adapt
- Final-Week Checklist
- Arrival-Day Checklist
- Before Leaving the United States
- Common First-Visit Mistakes
- Frequently Asked Questions
- Your Final USA Travel Checklist
- Share Your First-Visit Planning Experience
- Explore More Go Travel Box Guides
- Leave a Reply
1. Check Passport Validity and Each Traveler’s Documents
Start with the passport that will actually be used for the journey. Check the name, expiry date, condition, and any country-specific validity rule. The U.S. Department of State generally describes a requirement for validity at least six months beyond the intended stay, with exemptions under country-specific agreements. Do not assume that the same rule applies identically to every nationality.
Check each traveler separately. A child should not be assumed to be covered by a parent’s application or documents. For travel involving one parent, a guardian, or an unaccompanied minor, review consent, custody, and the departure country’s requirements as well as U.S. and airline requirements. USAGov advises carrying appropriate consent documentation, with English and notarization preferred in relevant situations.
Make sure names are entered correctly in flight and accommodation bookings. If a name differs between documents, establish what supporting evidence the airline and authorities require before travel. A booking correction can be harder to resolve close to departure.
Keep secure copies of important documents, but do not treat a photograph as a substitute for an original passport. Store a backup separately from the main travel wallet. Give a trusted person the information needed to help if documents are lost, without placing sensitive copies in public messages or comments.
| Document check | Action |
|---|---|
| Passport | Confirm validity and the rule for the nationality and route |
| Name | Match the booking details to the travel document |
| Children | Check individual documents and relevant consent papers |
| Copies | Keep secure backups separate from the originals |
| Special circumstances | Resolve discrepancies before buying nonrefundable travel |
2. Establish the Correct Visa or ESTA Arrangement
The Visa Waiver Program is available only to eligible travelers who meet its conditions. ESTA is the travel authorization used for that program; it is not a general replacement for a visa for every visitor. The official ESTA service describes qualifying business or tourism travel of 90 days or less, subject to the program’s eligibility rules.
If a visa is required, review the appropriate category and the process through the U.S. Department of State and the relevant embassy or consulate. Do not assume ordinary visitor permission covers work, study, or another purpose simply because a holiday is also part of the trip. Appointment availability, administrative processing, and document return can affect the timeline.
Apply or check authorization early, when the travel plan is being made. Do not leave ESTA to the airport or assume an application will be approved immediately. CBP guidance encourages advance application, and children traveling under the program require their own authorization.
Check the passport linked to an existing authorization. A new passport or a change in relevant personal or eligibility information can require a new ESTA. Its validity period is different from the time permitted for an individual U.S. visit. An authorization lasting beyond the holiday does not mean you may stay for that entire period.
Use the official government application service and read the current fee at the time of payment. Fees and procedures can change. A commercial application service is not required merely because it appears prominently in search results.
3. Review Current Entry Restrictions and Understand Admission
Before paying for travel, review current State Department and CBP guidance for the actual nationality, document, purpose, and circumstances. Current restrictions can distinguish between nationalities, visa categories, existing documents, and specified exceptions. A generic travel checklist cannot resolve those details for an individual traveler.
A visa or ESTA does not guarantee admission. The border officer determines admission and the authorized stay under the applicable rules. Keep the purpose and route clear, answer questions truthfully, and have the first accommodation details and onward or return arrangements available as appropriate.
Do not confuse a visa’s expiry date with the length of an admitted visit. The visa generally relates to applying for entry, while the admission record governs the authorized stay. This distinction is especially important when a visa remains valid long after the date by which a visitor must depart.
If a personal circumstance creates uncertainty, resolve it through the relevant official channel or a qualified immigration professional before travel. Do not rely on a friend’s experience, an old blog, or an assumption that an exception applies automatically.
4. Build a Route That Fits the Time Available

The United States is large, and familiar place names can create an unrealistic first itinerary. A trip connecting New York, Florida, the Grand Canyon, California, and Hawaii in a short period involves substantial travel. Count the complete transfer, including the journey to the airport, check-in, flight, baggage, and transport to the next room.
For a week, choose one region or one main city with a manageable nearby extension. For ten to fourteen days, two well-connected regions may work when each receives enough full days. A deeper visit to one region can be more enjoyable than a collection of brief arrivals.
Label each day as arrival, departure, transfer, or full sightseeing. The exercise reveals how much usable holiday remains. Keep the first day modest after a long international journey and avoid a nonrefundable event immediately after the expected landing time.
Choose the season for the intended activities. A winter city break, a summer mountain trip, and a tropical beach holiday have different clothing, access, and transport requirements. Check road status and operating calendars before treating a scenic route or attraction as available.
Location and map: Grand Central Terminal New York City
5. Arrange Insurance and a Plan for Medical Needs
Review what your existing coverage provides during a U.S. visit. Medical coverage, trip cancellation, interruption, baggage, and evacuation are separate benefits and can have different exclusions. Do not assume a credit-card benefit or an ordinary domestic policy covers every risk abroad.
If considering additional insurance, read the actual policy wording. Check the treatment of existing medical conditions, planned activities, deductibles, limits, required approvals, and the process for obtaining assistance. Keep the insurer’s contact and policy details available offline.
For ongoing medicines or medical equipment, prepare with your clinician and the relevant travel authorities. Confirm the medicine’s import status and the equipment arrangements before departure. A product being legal in your home country does not establish that it can be brought into the United States without restrictions.
Keep essential medicine and necessary documentation in accessible luggage. For controlled or unfamiliar products, check the specific substance and official rules rather than relying on a general quantity allowance. Plan how to manage a delayed bag or a longer-than-expected journey with professional guidance appropriate to your needs.
In an emergency, seek urgent assistance and call 911 when appropriate. Keep receipts and records for any insurance claim, but do not delay emergency care while searching for a policy number.
6. Prepare Cards, Cash, and a Complete Budget
Check that the cards you intend to use will work in the United States and understand their foreign-transaction, cash-withdrawal, and exchange terms. Carry a backup payment method separately. Know how to contact the provider and recover account access if a phone is lost.
Accommodation and rental-car deposits can reduce available credit even when they are not final expenses. Ask about payment-card requirements, holds, and release timing before arrival. A debit card can be treated differently from a credit card by a particular provider, so confirm the actual policy.
Budget for the final amount, including applicable tax, mandatory charges, parking, meals, and any service charges or gratuities. A menu or room’s starting price may not be the complete bill. Read the total and currency before approving a payment or a currency-conversion offer.
Carry only the cash that makes sense for the route and your comfort. CBP requires reporting when applicable currency or monetary instruments exceed $10,000, including relevant foreign-currency equivalents and instruments. Joint family reporting rules matter; do not assume dividing money between relatives removes a reporting obligation. Check the current FinCEN and CBP instructions for the situation.
| Money preparation | What to confirm |
|---|---|
| Main card | Acceptance, fees, PIN, and contact information |
| Backup | A separate usable payment method |
| Deposits | Card holds and provider requirements |
| Cash | A practical amount and any reporting obligation |
| Currency | The amount and currency before approving payment |
| Budget | Complete costs and a contingency |
7. Set Up Phone Access and Offline Information
Compare your provider’s roaming terms with a suitable local or travel data option. Check device compatibility, whether the phone is unlocked, activation timing, coverage, and whether the plan supports the calls or messages you need. A data-only plan may not replace every function of your usual number.
Make sure you can receive any security codes needed for banking, email, and travel accounts. Decide how you would recover access if the phone were lost or stopped working. Keep the essential first-day information available without depending on a new connection activating immediately.
Download maps for the relevant region, accommodation instructions, transport details, and tickets. An offline map is particularly useful in rural and park areas where service can be limited. Keep a small written record of the first address and an important contact as a backup.
For shared travel, agree on meeting points and a way to reconnect if someone loses service. Do not assume every person in the group will have the same coverage or battery life. A simple communication plan is more useful than relying on a crowded public Wi-Fi network at the moment something changes.
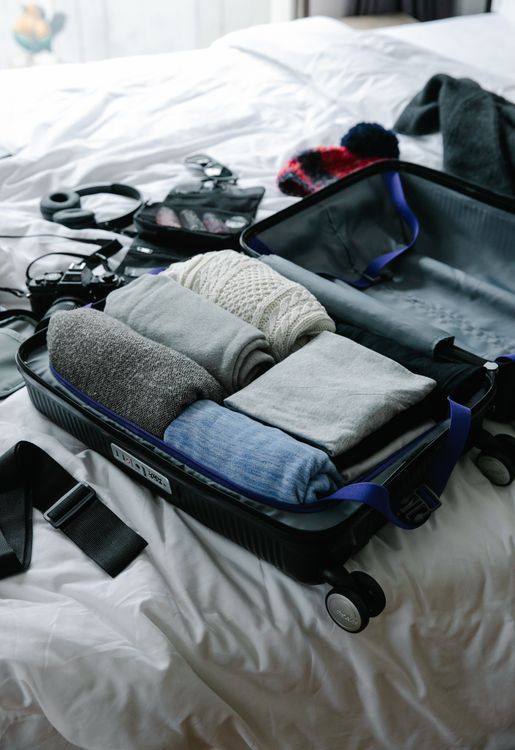
8. Pack for Airline Rules and the Actual Activities
Check the airline’s size, weight, and item limits for every flight, including any domestic segment. A bag accepted on an international fare may not be included on a separately booked domestic ticket. Add required baggage charges to the budget before deciding a route is inexpensive.
For U.S. security screening, the standard carry-on liquids rule generally limits ordinary liquids, gels, and aerosols to containers of 3.4 ounces or 100 milliliters within one quart-sized bag per passenger. Medicines and certain necessary items have separate screening provisions. Check TSA guidance for your specific items and any transit-country rules.
Spare lithium batteries and power banks belong in carry-on baggage under the applicable FAA and airline rules, with terminals protected and capacity limits observed. Remove them if a carry-on is taken for gate checking. Damaged or recalled batteries should not be carried. Check airline restrictions rather than assuming every battery-powered device is treated identically.
Pack layers, suitable footwear, and the items needed for the chosen activities. A city holiday, desert outing, mountain walk, and beach stay require different preparation. Confirm what accommodation or activity providers supply before buying or packing equipment you will not use.
Keep documents, essential medicine, charging equipment, and a change of clothes where you can access them during the journey. A delayed bag is easier to manage when the first day does not depend on everything arriving together.
9. Check Medicines, Food, and Restricted Items Before Departure
CBP advises travelers to carry medicines in their original containers with appropriate prescription or clinician documentation, preferably in English. Quantity and import rules depend on the product and circumstances. A commonly mentioned personal-use quantity is not a blanket permission to bring a restricted or unapproved drug.
Review FDA and CBP guidance for the actual medicine, especially controlled substances, injections, or products with unfamiliar ingredients. Check the airline and TSA arrangements for equipment and necessary liquids. Do this early enough to obtain any required documentation or an appropriate professional plan.
Declare food, plants, agricultural products, and relevant wildlife items when entering the United States. A sealed snack or a product that seems ordinary at home can still be subject to inspection or restriction. If unsure, declare it and ask the officer rather than assuming packaging makes it exempt.
Check alcohol, tobacco, gifts, valuable purchases, and any other regulated items under the current rules. Duty-free purchase does not mean unrestricted import. The rules can also differ for departure from your home country and entry into a transit country, so examine the complete route.
10. Make the First Airport Transfer Simple
Choose the transfer before departure and understand its operating hours, pickup location, luggage arrangements, and payment method. A train may be convenient at one airport, while a shuttle or a booked ride may suit another arrival. Compare the full group and baggage needs.
Leave time for the arrival process. Immigration, baggage, customs, terminal changes, and onward security can affect a connection. Follow the airport and airline instructions for your itinerary; preclearance and baggage arrangements can change the sequence. Do not assume every airport transfer works the same way.
If arriving late, confirm the accommodation’s check-in arrangements and how to reach someone if the flight is delayed. Avoid a long unfamiliar drive immediately after an exhausting international journey when a simpler first night is practical.
Keep the first address, reservation, and transfer instructions available offline. Know the difference between the airport’s official pickup arrangements and an unsolicited offer. Use the service and meeting point you have verified for the trip.
Location and map: John F Kennedy International Airport New York
11. Check the I-94 Record After Admission
Many visitors receive an electronic I-94 record as part of admission. Different arrangements and exceptions apply depending on the traveler and route, including land and selected ferry arrivals. Use CBP’s official I-94 information rather than assuming every visitor must complete the same paid application before flying.
If an I-94 applies to you, retrieve the record after entry and check the personal details, admission class, and authorized-stay information. The important date is not simply the expiry date printed on a visa. Keep a copy available and place the relevant departure deadline in your own calendar.
If the record appears wrong, use the appropriate CBP correction or deferred-inspection process promptly. Do not wait until the end of the holiday to investigate an apparent error. An ordinary hotel extension or a changed flight does not itself extend permission to remain.
Plan a departure comfortably within the authorized period. If circumstances require a change, check the rules for your actual admission category and seek appropriate official or professional guidance. ESTA validity and the permitted length of a particular visit are different matters.
12. Prepare for Domestic Flights and Local Transport

For a domestic flight, check TSA’s current acceptable-identification list and the airline’s rules. A valid foreign government-issued passport is an accepted identification type at U.S. airport checkpoints. International visitors do not need to obtain a U.S. driver’s license simply to have a REAL ID for a short visit when they use an acceptable alternative document.
Keep the original travel document secure and accessible for the journey. A phone photograph is not an automatic replacement. Check children’s airline requirements separately, especially for an unaccompanied minor or a journey connected to international travel.
Domestic flights can have different baggage, seating, and change conditions from the international ticket. Allow for airport transfers and security again. A one-hour flight can still consume much of a day when the complete journey is included.
For city travel, learn the relevant payment system, service hours, accessibility, and airport connection. Do not assume one city’s transport card works in another. Check the last practical service before relying on public transport after a late meal or performance.
For rides, confirm pickup points, the correct vehicle, luggage space, and any child-seat requirement. If a particular accessible vehicle or equipment arrangement is essential, book and confirm it early rather than assuming it will be available instantly.
13. Check Driving and Rental-Car Requirements
Driving rules are set partly by states, and rental companies have their own requirements. USAGov advises foreign visitors to check whether an International Driving Permit is needed alongside the home-country license for each state on the route. If an IDP is required, obtain it before the trip through the appropriate authority in the issuing country; the United States does not issue it to foreign visitors.
Confirm the rental company’s age rules, accepted license and card, deposit, authorized drivers, insurance arrangements, mileage conditions, and any cross-border or road restrictions. An online reservation does not remove the need to meet the collection requirements.
Understand tolls and parking before leaving the airport. A rental toll program, a local payment system, and an unpaid toll processed later can have different costs. Ask how charges are handled and keep the agreement available.
Plan manageable driving days with rest, food, and fuel or charging stops. Follow posted laws and current conditions. Mountain roads, snow, desert heat, and remote areas can require preparation beyond an ordinary city rental. Check the route and the vehicle’s suitability before choosing a remote outing.
Location and map: Grand Canyon Visitor Center South Rim Arizona
14. Budget for Current National Park Fees and Reservations

International visitors should review the National Park Service’s current nonresident pricing before estimating a park trip. In 2026, eleven specified parks charge an additional $100 to non-U.S. residents aged 16 and older, unless covered by an applicable pass. The list includes Grand Canyon, Yellowstone, Yosemite, and Zion, among others.
The Non-Resident Annual Pass is listed at $250 and has defined group coverage for private vehicles, motorcycles, and per-person entry sites. Compare the current rules with the actual people and parks on the itinerary. Do not rely on an older article that assumes the resident $80 annual pass is available to every international traveler.
An entry pass does not automatically provide a timed-entry reservation, campsite, lodge room, tour, or access to every special experience. Check those separately. Also review current road closures, seasonal operation, weather, and the practical journey from the accommodation.
For future travel years, recheck the published fees and rules before buying. A November 2026 planning example should not be treated as a guaranteed 2027 price. Build the route around confirmed access and leave an alternative for conditions.
15. Understand Food, Taxes, and Everyday Payments

Restaurant and shop prices may be shown before applicable sales tax. Accommodation can also have taxes, parking, deposits, and mandatory charges. Compare the final payable amount before deciding that an option is within the budget.
At restaurants, read the bill for any service charge or gratuity already added. Ask if its treatment is unclear before adding another amount. Table service, counter service, delivery, and a prepaid experience can involve different expectations and billing arrangements.
For dietary needs, discuss the specific requirement with the provider. A menu symbol or a general statement does not guarantee that a kitchen can meet every allergy need. Keep suitable backup food available, particularly on arrival or during a long transfer.
Check the rules for alcohol and age-restricted venues if they form part of the trip, and carry appropriate identification. Do not assume a home-country practice applies. If a meal includes alcohol, arrange suitable transport rather than planning to drive afterward.
For ordinary shopping, check return conditions before making a large purchase. Keep receipts for items relevant to customs declarations on the return journey. Duty, tax, and import rules in your home country are a separate consideration from the U.S. sales transaction.
16. Check Electricity, Measurements, and Time Zones
U.S. electrical outlets generally use 110/120-volt power. A plug adapter changes the physical connection; it does not automatically convert voltage. Check the input label on each device and use equipment appropriate for its requirements. Many charging devices handle a range of voltages, but that should be verified on the actual product.
Distances are commonly shown in miles, temperatures in Fahrenheit, and fuel in U.S. gallons. You do not need to memorize every conversion, but a few reference points help when reading a forecast or planning a drive.
| U.S. measure | Approximate equivalent |
|---|---|
| 1 mile | 1.6 kilometers |
| 1 U.S. gallon | 3.79 liters |
| 32°F | 0°C |
| 50°F | 10°C |
| 68°F | 20°C |
| 86°F | 30°C |
| 104°F | 40°C |
The country spans several time zones, and daylight-saving arrangements are not identical everywhere. Use the local time for flights, tours, hotel deadlines, and appointments. When a route crosses a time-zone boundary, check the itinerary rather than calculating from driving duration alone.
Put cancellation deadlines and important departures into a calendar with the correct timezone. A seemingly small time difference can affect a connection or the last refundable date for a booking.
17. Plan for Accessibility, Children, and Different Needs
Ask specific questions about the exact room, bathroom, transport, and attraction route. A broad accessibility description may not establish that a particular arrangement meets your needs. Confirm equipment availability, step-free access, distance, and the practical route to meals and activities.
For children, check the accommodation’s occupancy and bedding rules, activity age bands, and child-seat arrangements. International travel documents and consent requirements should be settled before the itinerary. Keep essential supplies accessible during a long journey and leave arrival day light.
For sensory or dietary needs, discuss the actual situation with the provider. Quieter visiting periods, a dependable room break, and a suitable meal plan can make a trip easier without requiring a completely different destination.
If traveling with a service animal, medical equipment, or another specialized need, check the relevant airline, accommodation, entry, and transport requirements early. Do not assume a domestic policy in one country answers the international journey’s requirements.
18. Keep Documents and Personal Information Secure
Carry originals when required and store them securely at other times. Keep backup copies separate from the travel wallet and protect online accounts with a recovery plan. A lost phone can affect tickets, payments, maps, and communication simultaneously, so avoid keeping the only copy of every essential item on one device.
Use verified providers and read the details before paying. Keep reservation numbers, passport information, and payment details out of public comments or social posts. Share the itinerary privately with a trusted person who can help if plans change.
Review the next day’s route, weather, and transport in advance. In outdoor areas, follow local alerts and leave a clear plan with someone when appropriate. For emergencies in the United States, call 911. For a lost passport or a consular issue, contact your own country’s embassy or consulate through its official contact information.
Three Manageable First-Visit Itineraries
Seven Nights in New York City

Choose one useful base and divide the full days by geography. Give one day to Central Park and a selected museum, another to Lower Manhattan and a waterfront area, and another to a neighborhood or cultural interest. Reserve a small number of important experiences and keep a flexible day for weather or a return visit.
Use arrival day to reach the room and settle in. Avoid a complicated day trip immediately after the international journey. Keep departure day direct, with enough time for the airport transfer and airline requirements.
Location and map: Central Park New York City
Ten Nights in Washington and New York
Use four nights in Washington and six in New York, or another split that fits your priorities. Allow the transfer day its own space. Compare the complete rail or flight journey, including station or airport access, baggage rules, and arrival time at the next room.
In Washington, choose a few Smithsonian museums and monuments, reserving free entry passes where required. In New York, group neighborhoods and paid priorities sensibly. The two-city plan offers variety without adding a cross-country flight to a first short visit.
Location and map: National Mall Washington DC
Ten Nights in One California Region
Choose a northern or southern California focus instead of trying to cover the whole state. A city stay plus a nearby coastal base can provide variety while keeping transfer distances manageable. Check current road access and the actual rental-car arrangement before committing to a scenic route.
If starting in San Francisco, a city-focused stay can use transport differently from a later coastal driving section. Consider whether a car is needed for the entire visit. Price parking and the collection and return plan, not just the rental’s daily headline rate.
Location and map: Ferry Building San Francisco California
These are planning models rather than instructions to connect all three. Choose one based on the international gateway, season, interests, budget, and time available.
An Illustrative Ten-Night U.S. Budget for Two Visitors
The figures below demonstrate the budgeting method. They are invented allowances, not live quotes. International airfare, entry-document fees, and insurance are excluded because they depend heavily on the travelers’ origin and circumstances. Add actual amounts for those items before using the total.
| Item | Calculation | Example amount |
|---|---|---|
| Accommodation, including assumed taxes and mandatory charges | 10 nights × $170 | $1,700 |
| One domestic travel segment | 2 travelers × $180 | $360 |
| Required baggage and seats | Group allowance | $100 |
| Airport and local transport | Group allowance | $260 |
| Food | 11 travel days × $85 for two | $935 |
| Paid attractions | Trip allowance | $300 |
| Subtotal | Sum of the six lines above | $3,655 |
| Contingency | 15% of $3,655 | $548.25 |
| In-country planning total | $3,655 + $548.25 | $4,203.25 |
This example assumes no full-stay rental car and no national park route requiring additional park charges. Add those costs if they apply. A ten-night trip has eleven calendar travel days in this model, which is why the food allowance differs from the number of room nights.
Keep a separate payment schedule for deposits and card holds. A trip can fit the final budget while still needing more temporary available credit during travel. Confirm provider requirements before arrival.
A Preparation Timeline You Can Adapt
| Stage | Main tasks |
|---|---|
| Before nonrefundable bookings | Check eligibility, passport, visa or ESTA process, and current restrictions |
| When choosing the route | Compare season, full transfer times, accommodation, and required access |
| After the main bookings | Arrange insurance decisions, essential activities, transport, and equipment |
| Several weeks before travel | Review medicine documentation, card access, phone arrangements, and family papers |
| Final week | Check alerts, airline changes, luggage rules, accommodation instructions, and weather |
| Arrival day | Follow admission and customs instructions, reach the room, and keep the plan modest |
| After entry | Check the I-94 if applicable and note the authorized-stay information |
| Before departure | Confirm transport, return-country requirements, documents, and any relevant declarations |
The table is a sequence, not a promise about visa or authorization processing times. Some travelers need to begin much earlier. Use the actual official process and appointment availability for your circumstances.
Final-Week Checklist
- Recheck passport, visa or ESTA details, and the current rules relevant to the travelers.
- Confirm the first address, late-arrival arrangements, and the airport transfer.
- Review insurance contacts, medicine documentation, and any equipment arrangements.
- Test payment access and keep a separate backup method.
- Confirm phone compatibility, activation, and account-recovery access.
- Download maps, tickets, booking details, and important contacts.
- Check baggage rules, liquids, batteries, and items requiring declaration.
- Review weather, road status, and reservation requirements for the first outings.
- Share a concise itinerary privately with a trusted contact.
Arrival-Day Checklist
- Keep the required original documents and first address accessible.
- Answer admission questions truthfully and follow the airport’s instructions.
- Declare relevant food, medicines, currency, and regulated items as required.
- Follow the correct baggage and onward-connection procedure for the itinerary.
- Use the verified transfer and confirm the accommodation arrival.
- Check the admission record after entry where applicable.
- Rest and keep the first sightseeing plan flexible.
Before Leaving the United States
Confirm the departing airport, terminal, local time, baggage rules, and transport. Review any documents or customs requirements for your next destination and home country. A requirement can apply on the return route even when it did not affect entry into the United States.
Depart within the authorized stay and retain useful travel evidence. CBP notes that some departures by land may not be recorded in the same way as air departures, so travelers using that route should follow current guidance and keep appropriate evidence of leaving.
Check hotel and rental-car final bills, return equipment, and keep receipts for deposits or later charges. Download any records needed for an insurance claim. Avoid placing a distant final outing between you and an important international departure.
Common First-Visit Mistakes
The most serious planning mistake is treating a visa or ESTA as a guarantee of entry or as the measure of how long you may remain. Another is relying on an old general rule without checking the actual nationality, document, route, and current conditions.
Practical mistakes are often simpler: too many regions, a late arrival with no transfer plan, a room whose deposit requirements are unclear, or a domestic flight priced without baggage. Most can be avoided by comparing the complete journey before booking.
Do not assume U.S. resident discounts or passes apply to international visitors. Check eligibility for park products, local promotions, and other reduced rates. A saving is useful only when the travelers qualify for it.
Frequently Asked Questions
Does every international visitor need ESTA?
No. ESTA is associated with eligible travel under the Visa Waiver Program. Other visitors may need a visa or have another applicable arrangement. Check the rules for the actual nationality, purpose, documents, and route.
Can I use an existing ESTA with a new passport?
Do not assume so. CBP identifies a new passport and certain changed personal or eligibility details as reasons a new authorization is required. Check the official service before travel.
Does a valid visa guarantee entry?
No. A visa permits travel to request admission under its conditions; the border officer determines admission. Keep the purpose and travel arrangements clear and follow current official guidance.
Is the visa expiry date my last allowed day in the country?
Not necessarily. The authorized stay is determined through admission and the applicable record, such as the I-94. Check that information after entry instead of using the visa’s expiry date as the departure deadline.
Do I need a U.S. REAL ID for a domestic flight?
International visitors can use an acceptable alternative identification document, including a valid foreign government-issued passport. Check TSA’s current list and the airline’s rules. A U.S. driver’s license is not required solely for that purpose.
Can I bring prescription medicine?
Check the specific product and circumstances with official FDA and CBP guidance. Carry original packaging and appropriate prescription or clinician documentation. A home-country prescription or a general personal-use quantity does not remove all import restrictions.
Do I need an International Driving Permit?
It depends on the state, license, and rental provider. Check each relevant state’s guidance and the rental company’s requirements. If needed, obtain the permit before travel through the appropriate authority in the country that issued your license.
Are national park costs the same for everyone?
No. Current NPS pricing distinguishes resident and nonresident products and adds nonresident fees at specified parks. Check the exact itinerary and group coverage before using an older pass estimate.
Should I bring cash or use cards?
Prepare a suitable main card, a separate backup, and a practical cash amount. Check fees, provider requirements, and any reporting obligation. The best balance depends on the route and the services you expect to use.
Can I see both coasts and Hawaii in one short visit?
It is possible to travel quickly, but the transfers can consume much of the holiday. One region or two well-connected areas usually provides a better first plan. Count full usable days before adding another flight.
How early should I start preparing?
Begin with the document and eligibility process as soon as the trip becomes a serious plan. Processing and appointment timelines vary. The checklist’s order is useful, but it does not replace the actual official timeline for your circumstances.
Which information should I check again just before travel?
Recheck entry rules, authorization details, airline notifications, luggage rules, arrival arrangements, and current conditions for the first outings. Confirm anything essential that depends on a particular room, vehicle, equipment item, or reservation.
Your Final USA Travel Checklist
- Required documents and permission checked for every traveler.
- Current nationality- and route-specific rules reviewed.
- Realistic itinerary with enough full days and a simple arrival.
- Insurance, medicines, equipment, and assistance contacts prepared.
- Complete budget, payment access, and backup arrangements ready.
- Phone access and offline information tested.
- Luggage and customs obligations checked.
- Admission record reviewed after entry where applicable.
- Departure planned within the authorized stay.
Share Your First-Visit Planning Experience
Which preparation made your first U.S. trip easier: a simpler route, a better airport transfer, an offline map, or a complete budget? Share a practical lesson that could help another visitor. Please do not post passport details, application numbers, or other private information.
Explore More Go Travel Box Guides
- The Ultimate First-Time Visitor’s Guide to New York City
- Best Tourist Attractions in Washington, D.C.
- Best Tourist Attractions in San Francisco
- A Complete Travel Guide to Hawaii
- Top 20 National Parks to Visit in the United States
- 25 Best Places to Visit in the USA: Complete Travel Guide
Leave a Reply
What would you like to know before you go?
Send us your question, feedback, or a place you would like to see covered.
Ask a travel question


Leave a Reply